Tuesday, August 28, 2018
How to Assign Multiple Fills and Strokes in Illustrator
How to Assign Multiple Fills and Strokes in Illustrator

One of the most important panels in Adobe Illustrator is Window > Appearance panel. One of the benefits of Appearance panel is that multiple fills and strokes can be assigned to the same object. Appearance panel actually works as a layers panel for object attributes. Besides assigning multiple fills and strokes there are and dynamic effects which can be applied to each individual stroke and fill attribute.
Why use appearance panel
The simplest answer is: because you are not limited to single fill and stroke applied to the object. Amazing artworks can be created using single path when combining multiple fills and strokes with dynamic effects and blending modes.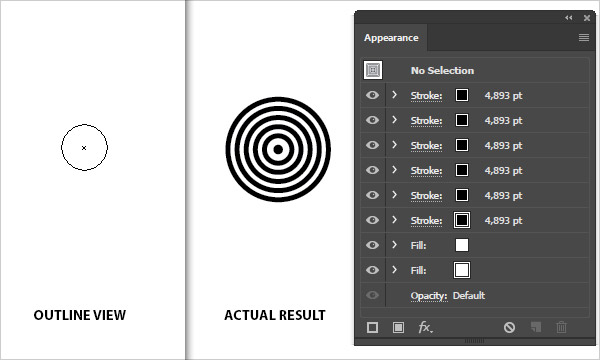
How to apply multiple fills and strokes to the same object
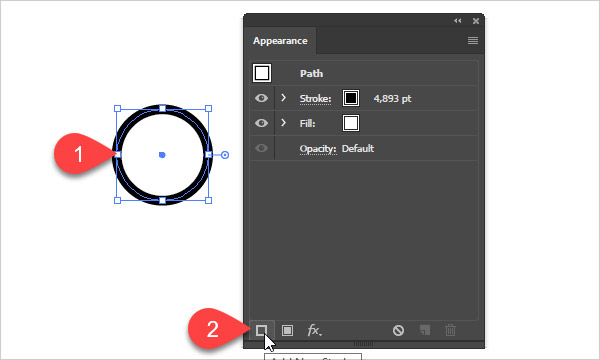
Here are two steps to add new fill/stroke:- The very first step is to select object using Selection Tool (V) to which you want to apply new fill or stroke
- In the Appearance panel (Window > Appearance) click on Add New Fill or Add New Stroke icon in the lower left corner
After adding multiple fills or strokes you can:
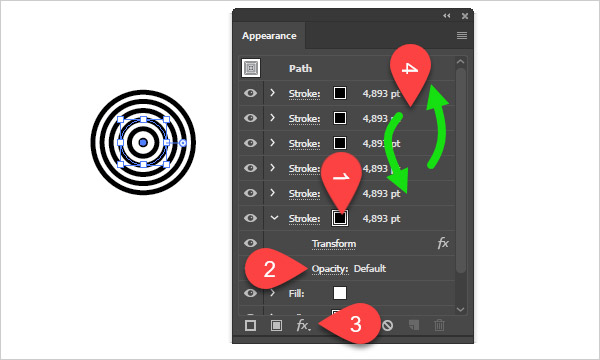
- Change color/stroke width for each and every attribute
- Change opacity/blending mode settings
- Apply some of the dynamic effects
- To drag fill/stroke to re-arrange their stacking order
Hiding and clearing attributes (strokes and fills)
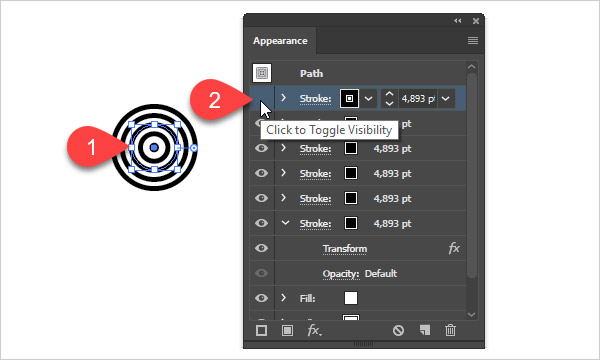
At any time you can hide any stroke or fill (attribute) from the Appearance panel:- Ensure that path/shape is selected before hiding its attribute
- Clicking on eyeball on the left side of attribute. To show again hidden attribute click on the empty square on the left side
In case you want to delete any attribute (stroke or fill) permanently do the following:
- Ensure that path/shape is selected before deleting its attribute.
- Drag attribute (stroke or fill) onto trash can or click to select attribute and click trash can icon

Using dynamic effects
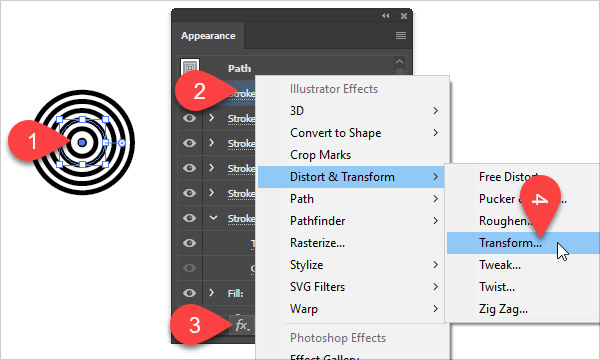
Another cool thing is the ability to use dynamic effects and here are the steps:- Ensure that path is selected
- Select fill or stroke in Appearance panel for which you want to add dynamic effect
- Click on fx icon
- Choose some of the available options like: Distort and Transform > Transform
Modify dynamic effects
In case you want to change or modify some of the already applied dynamic effects do the following:- Ensure that path/shape is selected
- Expand (open) attribute settings by clicking on the triangle on the left side
- Click on the effect name to open its dialog and modify or change settings

Work with Opacity and Blending modes
Another cool thing associated with multiple strokes and fills is the ability to change Opacity and blending mode:- Ensure that path/shape is selected
- Expand (open) attribute settings by clicking on the triangle on the left side
- Click on the Opacity link
- Change Opacity using slider or by typing number
- Change blending mode using blending mode drop-down list

Product used in this tutorial:
Adobe Illustrator CC 2017
Reference:
Apply Fill and Stroke attributes